

I'm so happy to be able to share this simple Valentine Paper Bag Journal project with you and show you the step by step instructions! It's really simple and VERY versatile...you can use any combination of papers, trims, and embellishments...whatever suits your fancy!
(BTW, I am in no way the inventor of the paper bag journal...I saw lots of these all over the place on Google Images, and they were all fun and different, with different ways to combine the pages and bind the edges, etc. I just played around with the inspiration I found and came up with this...)
For this tutorial, I've used my new "Valentine Variety Pack" digital clipart collection, available here at my Just Bee 'n Me Digital Boutique at Aimee Asher (just $4.99!)


To make the Paper Bag Journal, gather standard size paper lunch bags (I used 3 for this project), glue stick (or whatever whiz-bang glue stuff the pro scrappers use...I'm just a rank amateur), single hole punch, scissors, ruler, pen, and your papers, trims, ribbons, and embellishments...

Fold your paper bags in half, and alternate the direction of the bag with each section. I chose to have the bottom of the bag to the right for my first section...

...and the top of the bag to the right for my second section, and so on...

Next, use the hole punch to punch 3 holes in the folded part of your first bag. (I just eye-balled the placement cuz that's just how I roll, but you can measure if you want them to be more precise)...

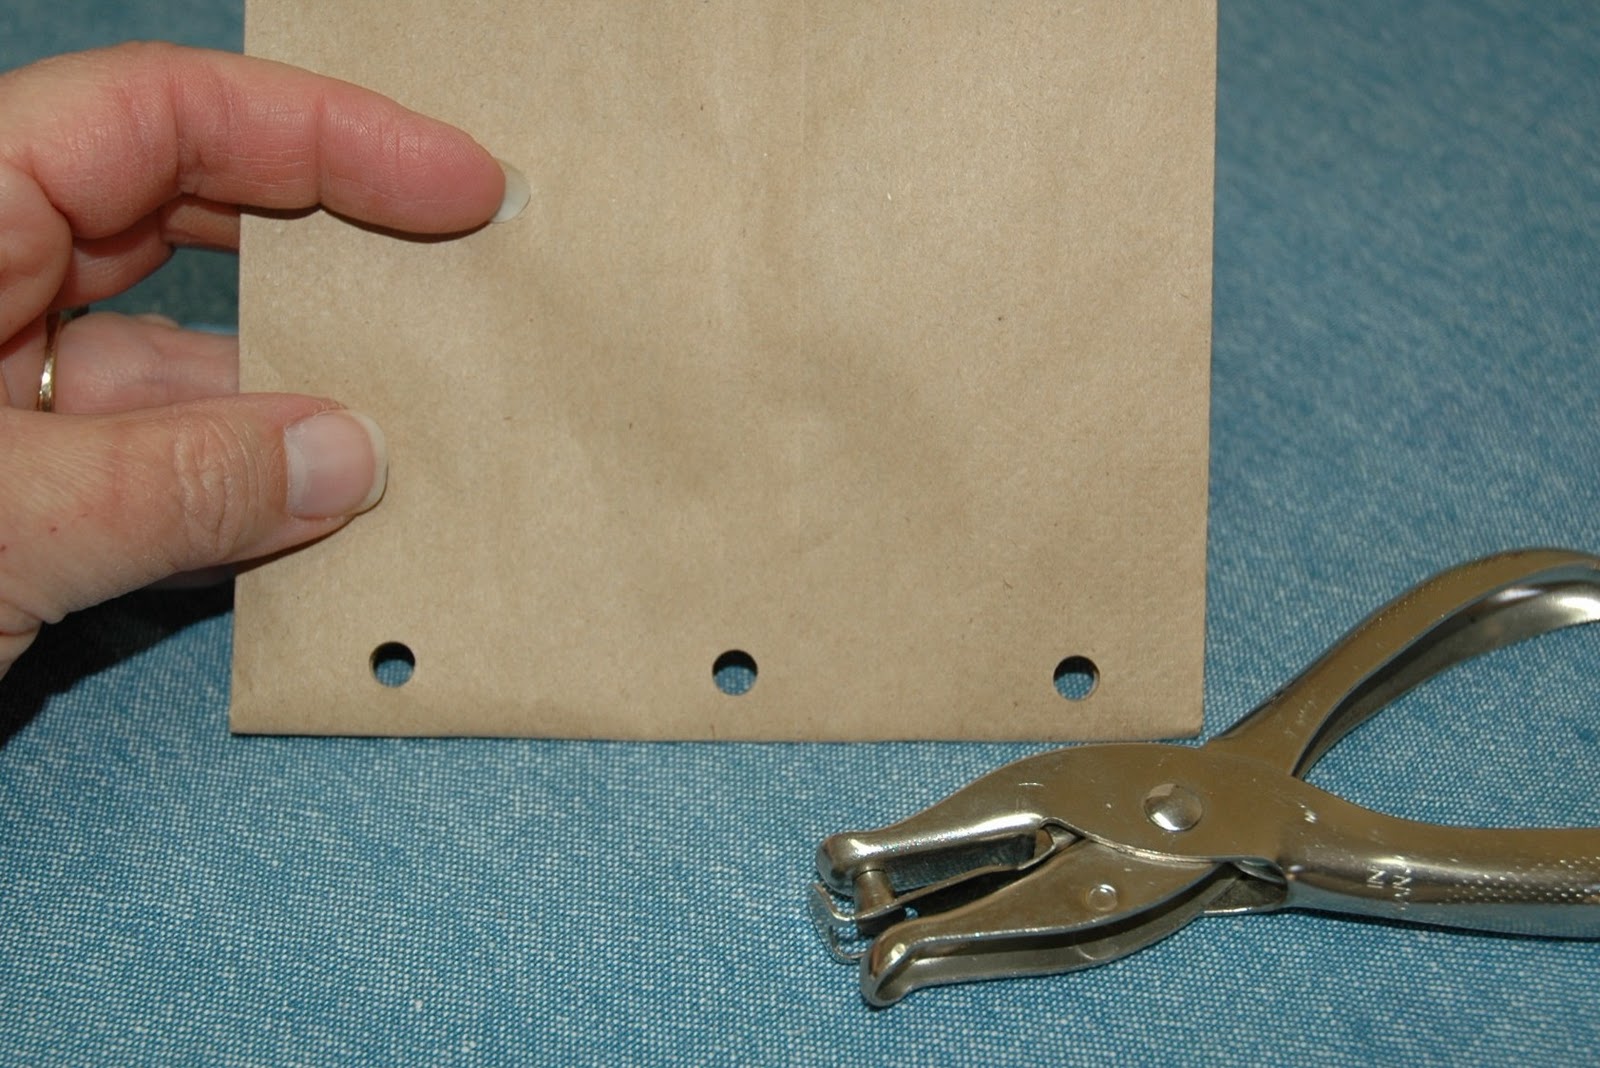
I tried to punch through more than one bag at a time, but my little hole punch just couldn't cut it, so you can use a pen to mark the position of the holes on the subsequent bags and punch them individually. Here's a little tip (but a blurry picture), use the open part of the hole punch on top of the bag so you can easily see the pen mark and center your punch...


Once you have all the bags punched, you are ready to start embellishing. Measure your paper for the cover - I cut my cover piece 4 1/2" x 4 1/2" to leave plenty of room for the holes, then I covered the back of the paper with glue stick...


Adhere the background paper to the front of the cover, then start embellishing to your liking...

I used a heart shaped paper doily and some trim from my stash to get it started. I chose my heart cherry clipart from my kit to add to the layout...simply print on white cardstock and cut out leaving a little white border if you desire...

To add a bit more interest, I used these little double-sided sticky foam dots to raise the cutout image slightly above the surface...


I added quite a bit more to this cover a little later as you can see in the first photo, but you get the idea. And let me give this disclaimer at this point; there is SO much more you can do with these pages than I did here. For example you can "age" the edges of the papers with distressing ink, use decorative edged scissors to cut your backgrounds, etc, but I kept it really simple to 1) allow me to finally get this finished, and 2) give you basic ideas that you can build on with your own cool ideas...
The front page of the journal has an opening that is perfect for tucking in little goodies of all kinds. I used printed inserts from my kit to share an inspirational sentiment, but you could easily add a CD, a candy bar (wrapped and decorated with papers and cutouts), a gift card, a flavored tea bag or hot cocoa package, a vintage hankie, or whatever you can dream up! To use one of the printed cards, simply print it out on white cardstock and staple on a piece of ribbon to add a little pull...


...then slip it into the bag opening...

Next, decorate the inside of the folded bag. I used background paper and an index card (for journaling or a personal message) for this layout. Then I added red rosebud cutout images with foam sticky risers and ric rac trim...


On the facing page I added one of my ready made printable designs and didn't add any other embellishments. I just glued it right over the folded over flap at the bottom of the bag (but you can actually utilize that folded part and decorate it as two separate pieces if you'd like (I did that extensively on the first paper bag journal I made)...

Next, flip the bag over and embellish the back...I made a "pocket" for this page by cutting a piece of coordinating paper 4 1/2" x 2 1/2" and gluing just 3 edges...

...then I made a little tag insert with an index card, hole punch, and ribbon...

I then cut out a word from my kit and added a button with ribbon trim...


Next, start on the second paper bag section...I used another printable for the entire page and simply added coordinating trims around the edges... (disclosure: I made the printable pages 5" x 5" in the kit, so if you use them as a page, you will need to trim them just a bit to leave room for the punched holes)...

Open the section #2 bag and decorate the interior...
I think the photos are pretty self explanatory (don't you love the glue on my fingers and nails...cute!)...


For a fun little touch, I glued the word "sweet!" and a rosebud image from my kit onto a circle tag, then attached it to the edge of the fold of the bag with the hole punch and ribbon (hint: don't try to punch through glued down ribbon...argh! I did it but it wasn't pretty!)


Here's another place for an insert - use your imagination! I used another printable Scripture card with a ribbon pull...

Then finish off the back of section #2...


Grab the final paper bag section #3...

...but please don't do this (this photo shows just a fraction of the white buttons I dropped on the floor :o(

After picking up every single button, I went on to finish section #3...

...and added a third and final insert...this time with ric rac for the pull...


Open the bag to complete the last center section...


And for the back of the journal, it might be nice to add a personal message or closing sentiment. I used a ready to print tag and rose image from my kit and added a bit of trim for mine...just keeping it simple...

The final step is binding the journal...I used ribbon and ric rac, but you could easily use twine, small metal rings, or whatever you'd like. To tie the journal together, simply cut ribbon lengths, stack the pages in order, thread the ribbon through the holes, and tie securely. I repeated this with two additional trims to make it extra frou frou!


That's it - it's really pretty simple, very versatile, and lots of fun! This would be a unique and inexpensive Valentine's gift for teachers, BFFs, kids, and others...simply adjust the contents and embellishments as appropriate! (by the way, it's my understanding that these paper bags are not acid-free, so keep that in mind if you want to use photos in your project...you might want to opt for a color copy rather than an original photo...)
Here's a quick look at how it all ended up when I was done...


I hope you enjoyed that and found it helpful...? I had SO much fun making the kit then putting the journal together! I'd love to see your spin on the paper bag journal...I hope you'll share it with all of us!
Happy crafting y'all, and stay warm and safe out there!!
Next up, a new kit for Spring/Easter, and I'll be exploring new crafting possibilities with the images. I hope you'll hang around to see more!
______________________________
Hey Y'all - I'm linking up to Get Your Craft On over at Today's Creative Blog! (Thanks Kim for this awesome Linky!) - please go and check out all the incredible projects for more crafty inspiration!!


Thank You Thank You for this awesome tutorial. I'm going to make one of these. I already got the kit (I hurried right over to Aimee Asher) and I printed off several sheets of the cards to put on some small Valentine gift bags that I'm going to give away. I told you I needed this kit badly!!!!!!!!!!! It's perfect for what I wanted to do.
ReplyDeleteI love it! I want to make one for my daughters and a friend of mine. Thank you so much for the tutorial Becky! It's wonderful!
ReplyDeleteHi Becky,
ReplyDeleteI'm your newest follower and I've just nominated you for the Stylish Blogger Award. You deserve it. Your blog is lovely! Check out the guidelines and grab the button on my post if you'd like to accept: http://www.cottageandcreek.com/Blog-Archive.aspx?id=617&cat=Life.
What a great tutorial. Super cute journal!
~Lynn
becky, theses journals are about THE cutest ever!! thank you so much for walking us through the process! these would make great birthday party invitations or even a garden party!
ReplyDeletesaving your tutorial to my craft folder!!
xxoo
becky
Becky, I just want to really thank you for your heartfelt comment today on my blog. Your encouraging words brought tears to my eyes. Also, your paper bag journal turned out so beautiful. I love all the "extras" you put into it and I am always a fan of whimsical art, and this is just full of whimsy. Very nice!
ReplyDeleteHugs,
Jenni
Becky, your creative juices are really flowing. What a fun design! I love seeing what you produce.
ReplyDeleteHugs,
Lallee
This is soooo cute! What a great tutorial! :)
ReplyDeleteBecky, I love this! And it's done with paper bags! I always love hidden pockets to add a special touch to a gift. You are so bright here in bloggyville.
ReplyDeleteWhat a sweet little journal! I came across this on Pinterest! Thanks for sharing this tutorial with us!!
ReplyDelete